
The Ultimate Homemade Chocolate Lava Cake: A Decadent Dessert You Can Master
There’s something undeniably magical about a warm chocolate lava cake. That moment when your spoon breaks through the crisp exterior, revealing a molten river of rich, dark chocolate… it’s pure bliss. For me, a perfect lava cake evokes memories of cozy weekends in my grandmother’s kitchen, the air thick with the aroma of baking chocolate and vanilla. She had a knack for making even the most elaborate desserts seem effortless, and her lava cakes were legendary. This recipe, inspired by her culinary wisdom, aims to demystify this classic dessert and empower you to create your own unforgettable chocolate lava cake experience. Whether you’re a seasoned baker or just starting your culinary journey, this guide will equip you with everything you need to achieve lava cake perfection.
Why This Recipe Works
- Foolproof Method: This recipe breaks down the process into simple, easy-to-follow steps, ensuring success even for beginners.
- Rich and Decadent Flavor: We use high-quality dark chocolate to create a truly indulgent chocolate experience.
- Perfect Texture: Achieve that desirable contrast between a crisp outer shell and a gooey, molten center.
- Minimal Ingredients: You likely already have most of these staples in your pantry.
- Quick Preparation: This dessert comes together in under 30 minutes, making it perfect for a spontaneous treat.
- Impressive Presentation: A beautifully plated lava cake is guaranteed to wow your guests.
Ingredients
- 6 ounces high-quality dark chocolate (at least 70% cacao), finely chopped
- 1/2 cup (1 stick) unsalted butter, cut into cubes, plus extra for greasing the ramekins
- 2 large eggs
- 2 large egg yolks
- 1/4 cup granulated sugar
- 1/4 cup all-purpose flour
- 1/4 teaspoon salt
- 1 teaspoon pure vanilla extract
- Optional: powdered sugar for dusting
Ingredient Notes:
- Chocolate: The quality of your chocolate directly impacts the final flavor. Opt for a dark chocolate you enjoy eating on its own.
- Butter: Use unsalted butter so you can control the salt level. Make sure it’s softened but not melted.
- Eggs: Room temperature eggs are essential for achieving a smooth, emulsified batter.
Step-by-Step Instructions
1. Preheat and Prep: Setting the Stage for Success
Preheat your oven to 425°F (220°C). Generously grease four 6-ounce ramekins with softened butter. This step is crucial for preventing the cakes from sticking. Dust the buttered ramekins with a light coating of granulated sugar, tapping out any excess. This adds a delightful, subtle crunch to the finished product. Picture golden-brown lava cakes fresh from the oven, ready to be devoured – that’s the vision we’re working towards!
2. Melt the Chocolate and Butter: The Foundation of Flavor
In a heatproof bowl set over a simmering pot of water (make sure the bottom of the bowl doesn’t touch the water), melt the chopped chocolate and butter together, stirring occasionally until smooth and completely combined. The double boiler method ensures gentle, even melting, preventing scorching. Remove from heat and set aside to cool slightly. This luscious chocolate mixture forms the base of our decadent lava cakes.
3. Whisk the Eggs and Sugar: Creating a Light and Airy Base
In a separate bowl, whisk together the eggs, egg yolks, and granulated sugar until the mixture is pale yellow, thick, and ribbons form when you lift the whisk. This step incorporates air into the batter, contributing to the cakes’ light texture. A hand mixer can also be used for this step, but be careful not to overmix.
4. Combine Wet and Dry Ingredients: Bringing It All Together
Gradually whisk the melted chocolate mixture into the egg mixture until fully incorporated. In a separate small bowl, whisk together the flour and salt. Gently fold the dry ingredients into the wet ingredients until just combined. Be careful not to overmix, as this can result in tough cakes. Overmixing develops gluten, which we want to avoid in this delicate dessert.
5. Add the Vanilla: A Touch of Warmth
Stir in the vanilla extract. The vanilla enhances the chocolate flavor and adds a touch of warmth to the overall profile.
6. Fill the Ramekins: Portioning for Perfection
Divide the batter evenly among the prepared ramekins, filling each about two-thirds full. See the vibrant lava cakes taking shape in their individual ramekins, poised for their transformation in the oven.
7. Bake to Perfection: The Moment of Truth
Bake for 12-15 minutes, or until the edges of the cakes are set and the centers are still slightly soft. The baking time can vary slightly depending on your oven, so keep a close eye on them. A toothpick inserted into the edge should come out clean, while a toothpick inserted into the center should come out with some moist crumbs attached. This indicates the perfect molten center.
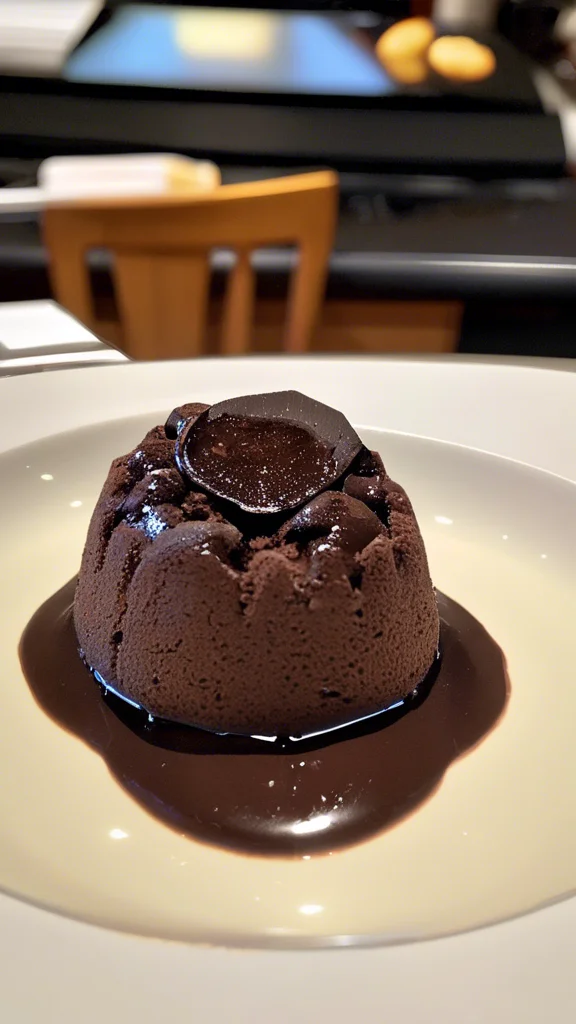
8. Cool and Invert: The Grand Reveal
Let the cakes cool in the ramekins for a few minutes before carefully inverting them onto serving plates. This allows the cakes to firm up slightly, making them easier to handle.
9. Dust with Powdered Sugar (Optional): A Touch of Elegance
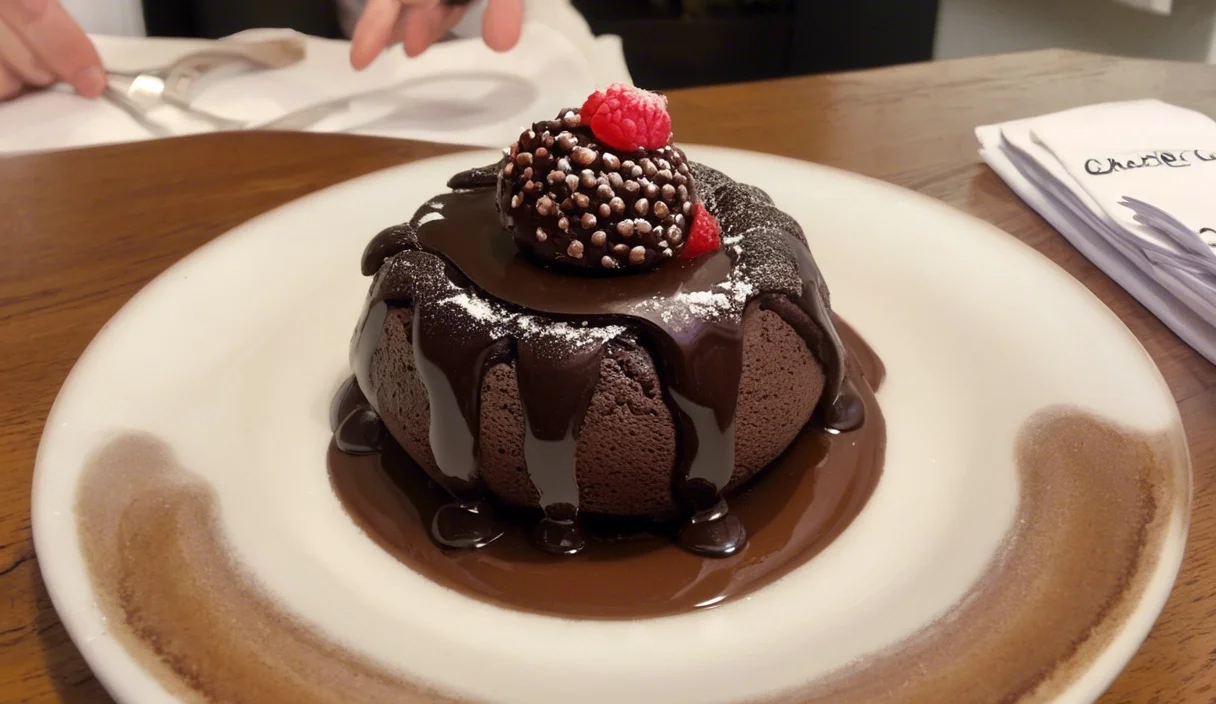
For an extra touch of elegance, dust the warm cakes with powdered sugar. This adds a beautiful visual contrast and a subtle sweetness. Imagine the warm, gooey center contrasting with the dusting of powdered sugar, creating a truly tempting presentation.
Maddy’s Tips for Success
- Room Temperature Ingredients: Using room temperature eggs and butter is crucial for creating a smooth, emulsified batter.
- Don’t Overmix: Overmixing can lead to tough cakes. Mix until just combined.
- Baking Time: Oven temperatures can vary, so keep a close eye on your cakes and adjust the baking time as needed.
- High-Quality Chocolate: Using good quality chocolate will significantly enhance the flavor of your lava cakes.
- Greasing the Ramekins: Generously greasing and sugaring the ramekins prevents the cakes from sticking.
- Cooling Time: Allowing the cakes to cool slightly before inverting them makes them easier to handle.
- Serve Immediately: Lava cakes are best served warm, straight from the oven.
Recipe Variations
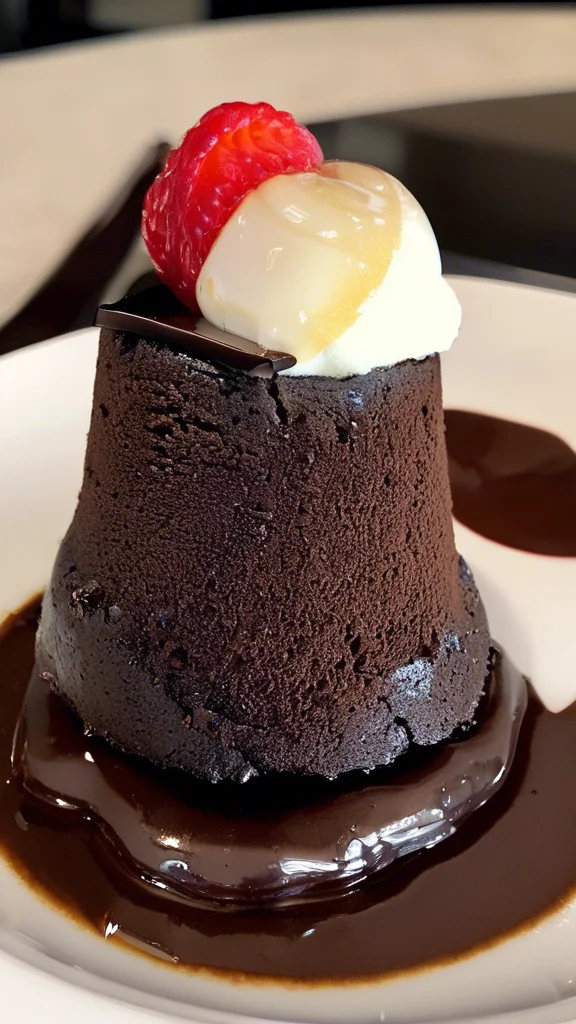
- Raspberry Lava Cakes: Add a few fresh raspberries to the bottom of each ramekin before adding the batter for a burst of fruity flavor.
- White Chocolate Lava Cakes: Substitute white chocolate for dark chocolate and reduce the sugar slightly.
- Espresso Lava Cakes: Add a teaspoon of instant espresso powder to the batter for a mocha-inspired twist.
Serving Suggestions
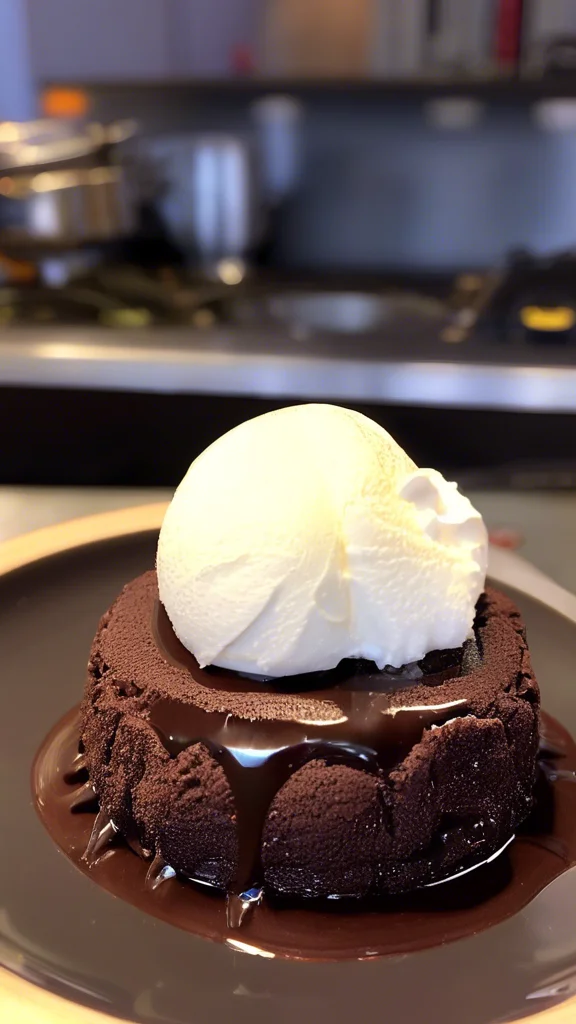
- Vanilla Ice Cream: A classic pairing that complements the warm chocolate perfectly.
- Fresh Berries: A light and refreshing contrast to the richness of the chocolate.
- Whipped Cream: A dollop of whipped cream adds a touch of lightness and sweetness.
Join the Conversation
I’d love to hear about your lava cake adventures! Share your photos and experiences in the comments below. Did you try any of the variations? What did you serve them with? Let’s connect and celebrate the joy of baking together!
Conclusion
So there you have it – my grandmother’s legacy, transformed into a recipe that’s both accessible and impressive. With a little practice and these helpful tips, you’ll be creating show-stopping chocolate lava cakes in no time. Enjoy every decadent bite!
Frequently Asked Questions
-
Can I make these ahead of time? While lava cakes are best served immediately, you can prepare the batter up to a day in advance and store it in the refrigerator. Add a few minutes to the baking time when baking from chilled batter.
-
Can I use a different size ramekin? Yes, but the baking time will need to be adjusted. Smaller ramekins will require less baking time, while larger ramekins will require more.
-
My lava cakes didn’t have a molten center. What went wrong? They were likely overbaked. Reduce the baking time by a minute or two next time and keep a close eye on them.
-
Can I freeze lava cakes? It’s not recommended to freeze baked lava cakes, as the texture will change upon thawing.
-
Can I use milk chocolate instead of dark chocolate? You can, but the flavor will be significantly sweeter and less intense. You may want to reduce the sugar in the recipe if using milk chocolate.
-
What if I don’t have a double boiler? You can create a makeshift double boiler by placing a heatproof bowl over a simmering pot of water. Make sure the bottom of the bowl doesn’t touch the water.
-
My lava cakes sunk in the middle. What happened? This can happen if the oven temperature was too low or if the cakes weren’t baked long enough for the edges to set properly.