
Classic French Éclairs: A Step-by-Step Recipe to Pastry Perfection
Crafted with Love and Flaky Goodness
There’s something undeniably magical about biting into a perfect éclair – that crisp shell giving way to a cloud of vanilla-speckled cream, all crowned with glossy chocolate. These elegant pastries trace their roots to 19th-century France, where renowned pastry chef Antonin Carême elevated them from humble “pain à la Duchesse” to the iconic treat we adore today. The name “éclair” (meaning “lightning” in French) supposedly comes from how quickly they disappear from pastry trays! More than just a dessert, éclairs represent French pâtisserie at its finest – a beautiful marriage of technique and artistry. As you’ll discover in the image below, achieving that golden, glossy perfection is within your reach. Whether you’re celebrating a special occasion or indulging in a weekend baking project, homemade éclairs transform simple ingredients into edible elegance that will make you feel like a Parisian pastry chef.
Why You’ll Love This Recipe
You’ll fall head over heels for this éclair recipe because:
1) Restaurant-quality results at home – Impress guests with professional-looking pastries without professional training
2) Masterclass in foundational techniques – Learn the art of choux pastry (pâte à choux), which opens doors to cream puffs, gougères, and more
3) Customizable canvas – The neutral base welcomes endless filling and topping variations
4) Deeply satisfying process – There’s pure joy in piping perfect pastry shells and watching them puff dramatically in the oven
Ingredients
Precision matters – use grams for best results
Choux Pastry:
– 125ml (½ cup) whole milk
– 125ml (½ cup) water
– 115g (½ cup) unsalted butter, cubed
– 1 tsp granulated sugar
– ¼ tsp fine sea salt
– 140g (1 cup + 2 tbsp) bread flour, sifted
– 4 large eggs, room temperature
Vanilla Pastry Cream:
– 480ml (2 cups) whole milk
– 1 vanilla bean (or 2 tsp pure vanilla extract)
– 100g (½ cup) granulated sugar
– 4 large egg yolks
– 40g (⅓ cup) cornstarch
– Pinch of sea salt
– 30g (2 tbsp) unsalted butter
Chocolate Glaze:
– 115g (4 oz) dark chocolate (60-70%), finely chopped
– 60ml (¼ cup) heavy cream
– 15g (1 tbsp) light corn syrup
Quality Notes: European-style butter (higher fat content) ensures flakier shells. Bread flour creates sturdier structure than all-purpose. Fresh, room-temperature eggs provide optimal rise.
Equipment Needed
- Heavy-bottomed saucepan
- Wooden spoon
- Stand mixer or hand mixer
- Piping bags
- Large star tip (e.g., Wilton 1M or Ateco 888)
- Small round tip (#230 or similar for filling)
- Baking sheets (light-colored, aluminum)
- Parchment paper
- Silicone spatulas
- Instant-read thermometer (optional but helpful)
- Wire cooling rack
Step-by-Step Instructions
Total Time: 2 hours (plus chilling)
Make the Pastry Cream First
-
Infuse milk: Combine milk and scraped vanilla bean seeds (and pod) in saucepan. Heat until steaming (180°F/82°C). Remove from heat; steep 30 minutes.
Tip: Steeping intensifies flavor. If using extract, add later. -
Temper eggs: Whisk yolks, sugar, cornstarch, and salt until pale. Remove vanilla pod from milk. Slowly pour ⅓ hot milk into yolk mixture, whisking constantly. Pour everything back into saucepan.
-
Cook cream: Return to medium heat. Whisk vigorously until thick and bubbling (about 2 minutes). Cook 1 more minute. Remove from heat; stir in butter until melted. Press plastic wrap directly on surface. Chill 4+ hours.
Prepare Choux Pastry
-
Cook dough: Combine milk, water, butter, sugar, and salt in saucepan. Bring to rolling boil over medium-high heat. Remove from heat; dump in all flour at once. Stir vigorously with wooden spoon until dough forms a ball and pulls away from pan (about 1 minute).
-
Dry dough: Return pan to low heat. Cook 2 minutes, stirring constantly, until thin film forms on pan bottom. Transfer to stand mixer bowl; cool 5 minutes.
-
Incorporate eggs: With paddle attachment on medium, add eggs one at a time, fully incorporating each before adding next. Beat until smooth, shiny paste forms that ribbons off spoon. As shown in the image below, the texture should resemble thick mayonnaise.
-
Pipe shells: Transfer dough to piping bag with star tip. Pipe 10cm (4″) logs onto parchment-lined sheets. Smooth peaks with wet finger. Bake at 200°C (400°F) for 15 minutes, then reduce to 180°C (350°F) for 20 minutes until deep golden. Crucial: Don’t open oven during first 15 minutes!
-
Dry shells: Turn off oven. Prop door open with spoon; let shells dry 30 minutes. Cool completely on rack.
Assemble
-
Fill éclairs: Poke three holes in each shell’s bottom with small tip. Fill piping bag (fitted with small round tip) with chilled pastry cream. Pipe into shells until heavy. As the image demonstrates, they should feel weighty when filled.
-
Glaze: Microwave chocolate, cream, and corn syrup in 20-second bursts until smooth. Dip éclair tops in glaze. Chill 15 minutes to set.
Tips for Perfect Results
- Egg temperature is critical – Cold eggs cause dough separation; warm them in hot water 5 minutes if needed
- Cook dough thoroughly – The “pan film” step removes excess moisture for better puff
- No peeking! Steam makes éclairs rise; opening the oven early causes collapse
- Dry shells thoroughly – Any residual moisture turns shells soggy after filling
- Sift flour – Lumps create uneven piping and baking
- Pipe consistently – Use a ruler guide under parchment for uniform sizing
Storage and Make-Ahead Instructions
Unfilled shells: Store in airtight container at room temperature up to 2 days. Refresh in 300°F oven for 5 minutes before filling.
Filled éclairs: Consume within 24 hours; store refrigerated in single layer.
Pastry cream: Keeps refrigerated 3 days; whisk until smooth before using.
Freezing: Freeze unfilled shells up to 1 month. Thaw at room temperature before refreshing in oven.
Variations and Substitutions
- Flavor twists: Add 1 tbsp espresso powder to pastry cream for mocha, or fold ¼ cup raspberry purée into cream
- Glaze alternatives: Use white chocolate ganache tinted with food coloring, or caramel glaze
- Dietary swaps: For gluten-free, use 1:1 GF flour blend; for dairy-free, substitute coconut milk and vegan butter
- Savory option: Omit sugar from choux; fill with chicken salad or herbed goat cheese
Maddy’s Tips for Success
From my pastry school notebook:
– When adding eggs to choux, the dough should pass the “V-test”: Lift your spoon – dough should fall slowly forming a “V” shape
– Chill pastry cream in a shallow dish to speed cooling
– If shells collapse, they’re underbaked – extend drying time
– Dip piping tip in oil before filling bag for cleaner release
– Warm glaze to 90°F (32°C) for perfect dipping consistency
Frequently Asked Questions
Q: Why did my éclairs deflate after baking?
A: Typically caused by opening the oven too early or underbaking. The structure sets during the last 10 minutes. Ensure proper drying phase!
Q: Can I make the dough without a mixer?
A: Absolutely! Use a wooden spoon and strong arm. Add eggs one at a time, beating vigorously until fully absorbed before adding next.
Q: My pastry cream is lumpy. Can I fix it?
A: Strain immediately through a fine-mesh sieve while hot. Whisk in butter afterward.
Q: How do I prevent soggy bottoms?
A: Only fill when shells are completely cool, and consume within 24 hours. Place a silica packet in storage containers.
Q: Why corn syrup in glaze?
A: It ensures glossy finish and prevents seizing. Substitute golden syrup or honey if needed.
Nutrition Information
While éclairs are an indulgence, they offer some nutritional benefits: Eggs provide protein and choline for brain health, dark chocolate contains antioxidants, and dairy contributes calcium. Moderation is key – savor every bite!
Serving Suggestions
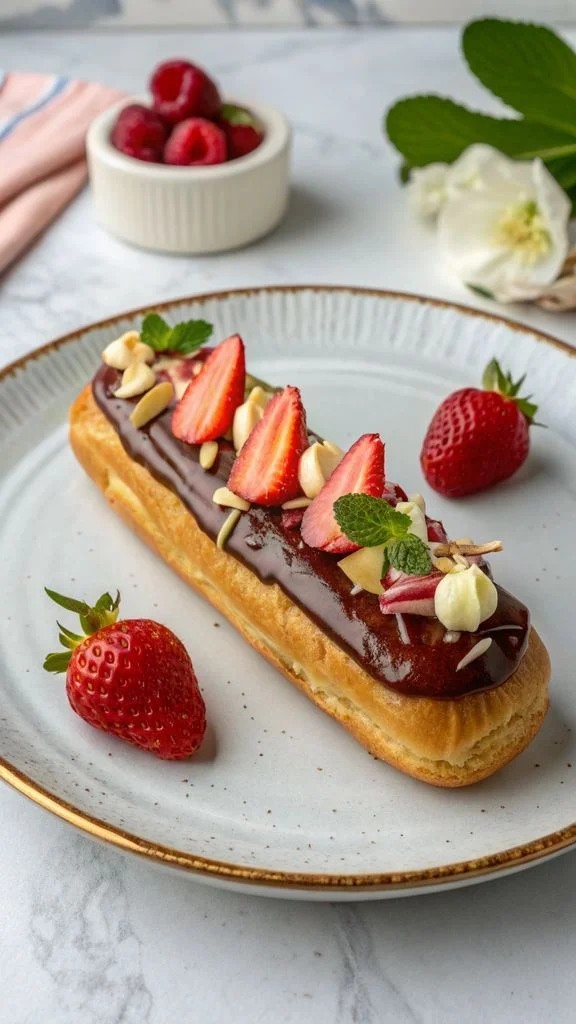
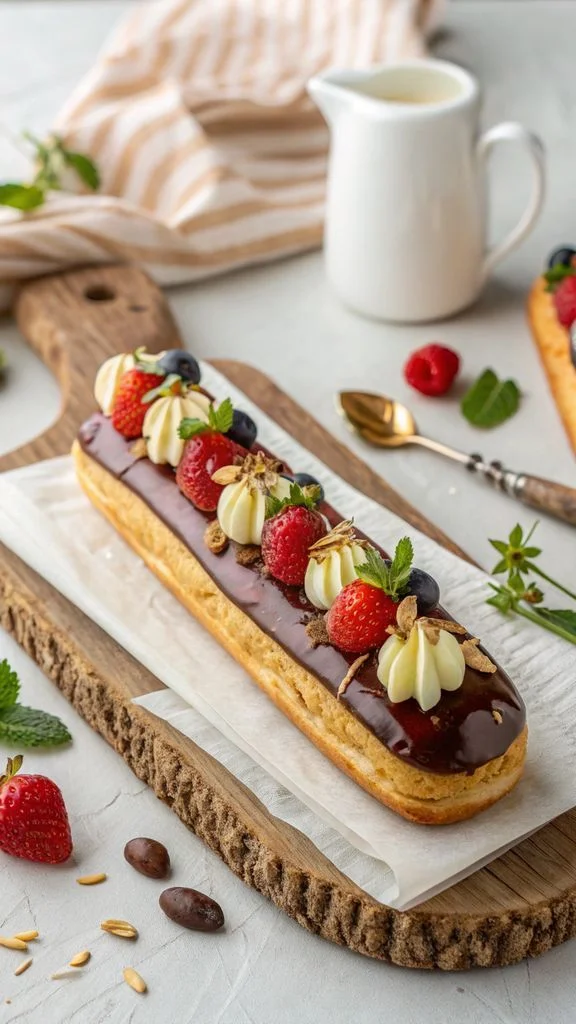
- Parisian elegance: Arrange on a tiered stand with fresh raspberries and edible flowers
- Dessert board superstar: Slice horizontally and fan with fruit coulis for restaurant-style plating
- Coffee companion: Serve alongside espresso for authentic café experience
Nothing compares to the pride of presenting homemade éclairs – crisp, creamy, and impossibly chic. When you see that first perfect puff emerge from your oven, you’ll understand why these pastries have captivated dessert lovers for centuries. Tag us in your éclair photos – I can’t wait to see your creations!
Printable Recipe Card
Want just the essential recipe details without scrolling through the article? Get our printable recipe card with just the ingredients and instructions.