

The Ultimate Homemade Peanut Butter Blossoms Recipe: A Kiss of Chocolate Perfection
There’s something truly magical about the combination of peanut butter and chocolate. It’s a classic pairing that evokes childhood memories, cozy evenings, and pure, unadulterated joy. And when that dynamic duo takes the form of a Peanut Butter Blossom, well, let’s just say resistance is futile. These delightful little cookies, with their soft, peanut buttery centers and that signature Hershey’s Kiss nestled on top, are a guaranteed crowd-pleaser. Whether you’re a seasoned baker or just starting your culinary journey, this recipe is your ticket to Peanut Butter Blossom perfection. Get ready to experience the joy of baking these timeless treats – your taste buds will thank you!
Why This Recipe Works
- Simple Ingredients: You likely already have everything you need in your pantry to make these scrumptious cookies.
- Easy to Follow: This Peanut Butter Blossom recipe is designed for bakers of all levels, with clear, concise instructions.
- Quick to Bake: These cookies bake in under 15 minutes, making them a perfect last-minute treat.
- Unforgettable Flavor: The combination of peanut butter and chocolate is a classic for a reason. It’s pure heaven in every bite.
- Perfect for Sharing: Peanut Butter Blossoms are ideal for potlucks, holidays, or simply enjoying with a glass of milk on a quiet evening.
- Customizable: Get creative with different types of chocolate kisses or add sprinkles for a festive touch.
Ingredients
- 1 cup creamy peanut butter (I prefer a classic, smooth peanut butter for these blossoms)
- 1/2 cup granulated sugar
- 1/2 cup packed light brown sugar
- 1 large egg
- 1 teaspoon pure vanilla extract
- 1 1/4 cups all-purpose flour
- 1 teaspoon baking soda
- 1/2 teaspoon salt
- 1/2 cup (1 stick) unsalted butter, softened
- Approximately 48 milk chocolate Hershey’s Kisses, unwrapped (or your favorite flavor!)
- Granulated sugar for rolling (optional, but adds a beautiful sparkle)
Step-by-Step Instructions
1. Preheat and Prep:
Preheat your oven to 375°F (190°C). Line baking sheets with parchment paper. This will prevent the Peanut Butter Blossoms from sticking and make cleanup a breeze. A picture truly captures the essence of a perfectly prepped baking sheet, ready for these delightful cookies.
2. Cream Together Butter and Sugars:
In a large mixing bowl, cream together the softened butter, granulated sugar, and brown sugar until light and fluffy. This step is crucial for creating a tender cookie texture. I like to use an electric mixer, but you can certainly do this by hand with a little elbow grease.
3. Incorporate the Wet Ingredients:
Beat in the egg and vanilla extract until well combined. The vanilla adds a warm, aromatic note that complements the peanut butter beautifully. Imagine the rich, creamy mixture forming the base of these irresistible Peanut Butter Blossoms.
4. Dry Ingredients Dance:
In a separate bowl, whisk together the flour, baking soda, and salt. Gradually add the dry ingredients to the wet ingredients, mixing until just combined. Be careful not to overmix, as this can result in tough cookies.
5. The Peanut Butter Star:
Now for the star of the show – the peanut butter! Gently fold in the peanut butter until it’s evenly distributed throughout the dough. The dough will become thicker and slightly sticky.
6. Roll and Chill (Optional):
If you have the time, chilling the dough for about 30 minutes will help prevent the cookies from spreading too much during baking. Scoop out rounded tablespoons of dough and roll them into balls. If you’re adding that extra sparkle, roll the dough balls in granulated sugar before placing them on the prepared baking sheets.
7. Bake to Golden Perfection:
Bake the Peanut Butter Blossoms for 8-10 minutes, or until the edges are lightly golden brown. Keep a close eye on them, as oven temperatures can vary. You want them to be soft and chewy, not overbaked.
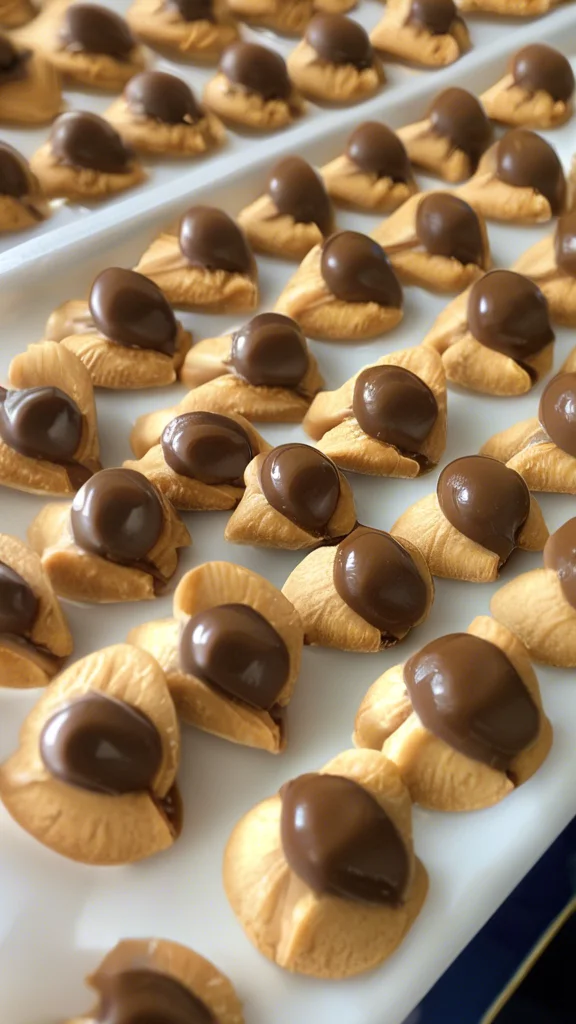
8. The Chocolate Kiss:
Here comes the moment we’ve all been waiting for! Immediately after removing the cookies from the oven, gently press a Hershey’s Kiss into the center of each cookie. The heat from the cookie will soften the chocolate, creating that signature melt. A close-up shot truly showcases that perfect chocolate kiss nestled atop the warm, peanut buttery cookie.
9. Cooling and Setting:
Let the cookies cool on the baking sheets for a few minutes before transferring them to a wire rack to cool completely. This allows the chocolate to set and prevents the bottoms from becoming soggy.
Maddy’s Tips for Success
- Room Temperature Ingredients: Using softened butter and room temperature eggs will ensure that your ingredients blend together smoothly, creating a consistent dough.
- Don’t Overmix: Overmixing the dough can develop the gluten in the flour, resulting in tougher cookies. Mix just until the ingredients are combined.
- Chilling the Dough: Chilling helps prevent spreading and enhances the flavor. If you’re short on time, you can skip this step, but the cookies might be slightly flatter.
- Kiss Placement: Press the Kisses firmly into the cookies, ensuring they adhere properly.
- Storage: Store your Peanut Butter Blossoms in an airtight container at room temperature for up to a week.
Recipe Variations
- Holiday Blossoms: Use festive Hershey’s Kisses, like peppermint or candy cane, for a holiday twist.
- Nutty Blossoms: Add chopped peanuts or other nuts to the dough for extra crunch and flavor.
- White Chocolate Blossoms: Swap the milk chocolate Kisses for white chocolate ones for a different flavor profile.
Serving Suggestions
- Milk and Cookies: The classic pairing! Enjoy your Peanut Butter Blossoms with a tall glass of cold milk.
- Coffee Break Treat: These cookies are the perfect accompaniment to your morning coffee or afternoon tea.
- Dessert Platter: Add Peanut Butter Blossoms to your dessert spread for a touch of sweetness and nostalgia.
Join the Conversation
I’d love to hear about your Peanut Butter Blossom adventures! Share your baking experiences, tips, and photos in the comments below. Did you try any of the variations? Let me know what worked best for you!
Conclusion
Baking Peanut Butter Blossoms is a truly rewarding experience. From the simple ingredients to the satisfying process of pressing in that perfect chocolate kiss, these cookies are a testament to the joy of homemade treats. I hope this recipe brings as much happiness to your kitchen as it does to mine.
Frequently Asked Questions
- Can I freeze the dough? Yes, you can freeze the dough for up to 3 months. Thaw it overnight in the refrigerator before baking.
- What if I don’t have Hershey’s Kisses? You can use any type of chocolate kiss or even other small candies like Rolos or mini peanut butter cups.
- My cookies spread too much. What did I do wrong? The butter might have been too soft, or the dough wasn’t chilled long enough. Try chilling the dough for a longer period next time.
- Can I use a different type of flour? All-purpose flour works best for this recipe. Substituting other flours may alter the texture of the cookies.
- How do I store leftover Peanut Butter Blossoms? Store them in an airtight container at room temperature for up to a week.
- Can I make these cookies vegan? There are vegan substitutions available for butter and eggs, but the texture and flavor may be slightly different.
- My chocolate kisses melted completely. What happened? The cookies may have been too hot when you added the kisses. Try letting them cool slightly before pressing in the chocolate.